
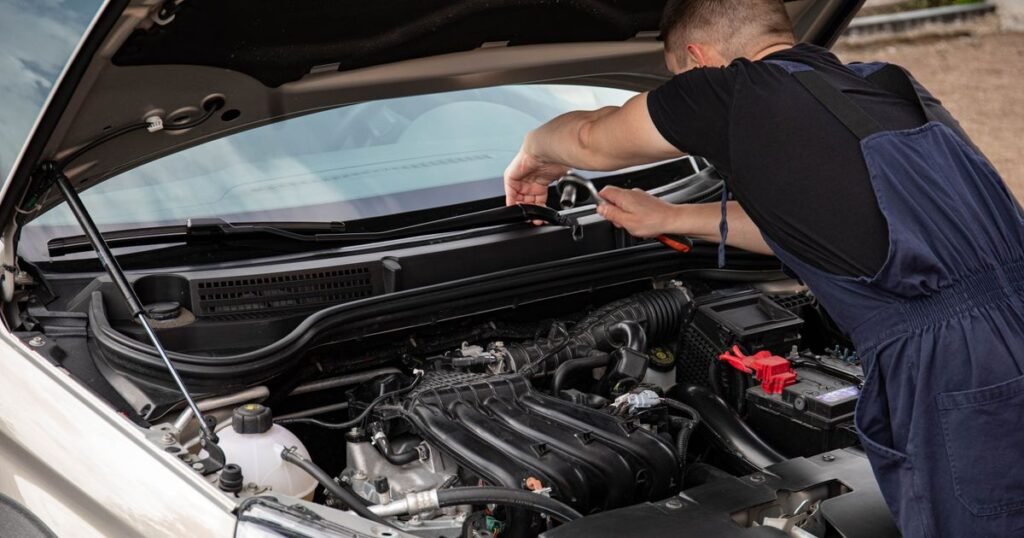
Short answer: Before you buy any used car, check the body and tires, the engine bay and fluids, the interior and electronics, and the paperwork — then take a proper test drive and get a pre-purchase inspection from an independent mechanic. This checklist walks through every check in order, so a 30-minute inspection can save you thousands in hidden repairs.
Before You Go: What to Bring and Ask For
A good inspection starts before you see the car. Ask the seller for the VIN, the title status, service records, and the reason for selling — and run a vehicle history report with the VIN before you travel. Bring a flashlight, a small magnet (it will not stick over thick body filler), a tire tread gauge or a coin, paper towels for checking fluids, and this checklist on your phone.
Meet in daylight, on dry pavement, with the engine cold. A warm engine can hide cold-start smoke and hard-starting problems, and rain hides paint flaws and leaks. If the seller insists on meeting at night or refuses a cold start, treat that as a red flag, not a scheduling quirk.
Exterior and Body: Rust, Paint, and Panel Gaps
Walk slowly around the car twice: once at standing height, once crouched at bumper level. Look down each side for ripples in the reflections — wavy panels usually mean body repair. Panel gaps should be even all the way around the hood, doors, trunk, and fenders; a wide gap on one side and a tight gap on the other usually means a panel was removed or replaced after a crash.
Check for rust at the wheel arches, the bottom edges of the doors, the trunk lip, and under the doorsills. Surface rust on a bolt is cosmetic; bubbling paint or soft, flaking metal is structural and expensive. Look for overspray on window trim, door handles, and lights — a sign of a respray — and for paint that does not quite match between panels. Open and close every door, the hood, and the trunk: they should shut with one smooth motion and sit flush. Check the windshield and windows for chips and cracks, and make sure all lights and lenses are intact and not fogged with moisture inside.
Tires and Wheels: Tread, Age, and Matching Rubber
Tires tell you how the car was maintained. Check the tread depth across the full width of each tire: wear on the inner or outer edge only points to alignment or suspension problems, and wear in the center points to over-inflation. Uneven wear between tires on the same axle is a warning sign, not normal wear.
Read the DOT date code on the sidewall (the last four digits are the week and year of manufacture). Tires older than six years should be budgeted for replacement even if the tread looks fine, because the rubber hardens with age. All four tires should be the same brand and model family — a mixed set usually means the seller replaced only what failed. Look at the wheels for curb rash, bends, and cracks, and check that the spare, jack, and lug wrench are present. For the cost side of a worn set, see how long brakes last and what a tire replacement typically costs in our guide on how to change a flat tire.
Under the Hood: Engine, Belts, and Leaks
With the engine cold and off, open the hood and look first, before touching anything. The engine bay should be dirty in a normal, even way — a spotlessly steam-cleaned bay on an old car can mean the seller washed away leak evidence. Look under the car for fresh drips, and check the ground where it was parked for oil, coolant (green, pink, or orange), or transmission fluid (reddish) stains.
Pull the oil dipstick: the oil should be amber to dark brown and smooth, never milky (coolant mixing in) and never gritty with metal flakes. Check the coolant reservoir level and color, and look inside the oil filler cap for a milky, mayonnaise-like residue — another sign coolant is getting into the oil. Inspect belts for cracks and fraying, and hoses for soft, swollen, or cracked rubber. Start the engine and listen: it should catch quickly, idle smoothly, and settle within a minute. Blue smoke from the exhaust means burning oil, white smoke that does not clear means coolant, and black smoke means excess fuel — any of them needs a mechanic’s explanation before you pay. Rattles, ticking, or knocking on a cold start are walk-away signs unless a mechanic says otherwise.
Fluids and Under the Car
If you can safely look underneath — or better, during the mechanic’s inspection on a lift — check for leaks at the engine, transmission, and differential, and for rust on brake lines, fuel lines, and the subframe. Fresh undercoating sprayed over everything can hide rust, so ask when it was applied and why.
Check the transmission fluid where the car has a dipstick (many newer cars are sealed): it should be pinkish-red and clean-smelling, not brown or burnt-smelling. Burnt transmission fluid, slipping, or harsh shifts on the test drive are expensive problems — see the signs of transmission problems before you decide. Brake fluid should be clear to light amber in its reservoir, not dark brown. Low fluid in any reservoir with no visible leak still needs an explanation.
Interior and Electronics: Every Switch, Every Seat
Sit in every seat. Check for tears, stains, and water damage, and lift the floor mats to look for dampness, mud, or a musty smell — signs of flood damage. A strong air freshener in a used car is worth a second sniff: it sometimes covers mold or smoke. Check that the headliner is not sagging and that all seat adjustments, including power seats and heated seats, work in every direction.
Then test everything electrical, one switch at a time: windows up and down, door locks, mirrors, sunroof, wipers and washers, horn, hazard lights, headlights, brake lights, turn signals, and the rear defroster. Turn on the air conditioning and the heat — weak cooling on a hot day is a repair bill, not a minor fault. Pair your phone to the infotainment system, test the backup camera, and check every USB port and 12V outlet. On the dashboard, turn the key to “on” without starting: every warning light should illuminate briefly, then go out once the engine runs. A light that never comes on may have had its bulb removed to hide a fault — and a check-engine light that stays on needs a scan, not a seller’s reassurance.
The Test Drive: Cold Start, City, and Highway
Never buy without driving the car yourself, for at least 20 minutes, covering slow streets, a hill, and highway speed. Start with the engine cold so you hear the real cold-start behavior. The car should track straight with your hands light on the wheel, brake without pulling to one side or pulsing through the pedal, and shift smoothly with no slipping, flaring, or hard clunks.
Listen for humming that rises with speed (wheel bearings), clunking over bumps (suspension), and grinding when braking. Try the brakes firmly from moderate speed in a safe place: the pedal should feel firm, not spongy or sinking. If the steering wheel shakes under braking, see why your car shakes for the likely causes and costs. Test the parking brake on a hill, do a full-lock turn in a parking lot listening for clicking from the front axles, and check that the car holds highway speed without wandering or vibrating. Turn the radio off for the whole drive — you are listening to the car, not the stereo.
The OBD Scan: What the Computer Knows
Ask the seller if you can plug in an OBD-II scanner (a basic Bluetooth scanner costs little and works with a free phone app). Check for stored and pending trouble codes, and — just as important — whether the readiness monitors are all set. Monitors that are “not ready” can mean the seller recently cleared codes to turn off the check-engine light; a car with cleared codes needs a proper drive cycle and a re-scan before you trust it.
Note any codes and look them up before negotiating. A single evaporative-system code can be a loose gas cap; misfire, transmission, or catalytic-converter codes are real money. If the seller refuses a scan, that refusal is information too — a confident seller with nothing to hide rarely says no.
Paperwork: Title, VIN, History, and Liens
This is where the cheapest cars become the most expensive. Match the VIN on the dashboard, the driver’s door jamb, and the title document — all three must agree, character for character. Check the title status: a clean title is the baseline; salvage, rebuilt, flood, or branded titles slash the value and can make insurance and resale difficult. If the seller’s name is not on the title, or the title is “open” (signed but undated), walk away — title jumping is a common scam.
Run a vehicle history report and read the whole thing, not just the headline: accident records, odometer readings over time (look for readings that go backwards), service history gaps, number of owners, rental or fleet use, and any lien records. Ask for service receipts and compare the mileage on them with the odometer. Confirm there is no outstanding loan or lien on the car — you do not want to pay the seller and then find the lender still owns it. For a private-party sale, complete the sale at the title office or bank where the lien can be verified and released, and never pay in full before the signed title is in your hand.
Red Flags: When to Walk Away
Walk away — or at least pause for an independent inspection — if you find any of these: a title that does not match the seller or the car, signs of flood damage, frame or structural rust, a slipping transmission, milky oil or coolant in the oil, a check-engine light the seller “just cleared,” mismatched VINs, or pressure to decide today with a cash-only price. Any one of these can cost more than the car is worth. There is always another used car; there is not always another budget to fix the wrong one.
How Much Does a Pre-Purchase Inspection Cost?
A pre-purchase inspection by an independent mechanic typically costs $100 to $200 and takes 45 to 90 minutes, including a lift inspection, a scan, and a written list of what needs attention now and soon. It is the best money in the whole buying process: it turns a seller’s story into a mechanic’s report, and it gives you a repair estimate to negotiate with. If the seller refuses to let the car go to your mechanic, that is a red flag in itself. For the cars that pass, the inspection report becomes your maintenance plan for the first year — brakes, tires, and fluids first. See how long brakes last and our brake pads and rotors cost guide to price what the report finds.
Negotiation: Turning Findings Into a Fair Price
Use the inspection, not emotion, to negotiate. Add up the cost of everything the car needs in the next 12 months — tires, brakes, fluids, the repair the scanner found — and compare that total with the asking price and with comparable cars in our best used cars under $25,000 guide. A car that needs $800 of work is not overpriced at $800 below market; it is fairly priced. A car that needs $800 of work at full market price is overpriced by $800.
Get the agreed price and everything the seller promised (new tires, a repair, a second key) in writing on the bill of sale, with the VIN, the odometer reading, and the date. Keep the history report, the inspection report, and the receipts together — they are your proof of condition if anything is disputed later, and they raise the car’s value when you sell it on.
This guide is general information for buyers, not professional mechanical or legal advice. A pre-purchase inspection by a qualified independent mechanic is the only way to know a specific car’s true condition before you buy.
Frequently Asked Questions
What should I check first when inspecting a used car?
Start with the paperwork: match the VIN on the dashboard, door jamb, and title, and run a vehicle history report. Then check the body for rust and repair signs, the tires and their age, the engine bay and fluids, and the interior electronics — in that order, with the engine cold.
How much does a pre-purchase inspection cost?
A pre-purchase inspection by an independent mechanic typically costs $100 to $200 and takes 45 to 90 minutes, including a lift inspection, an OBD scan, and a written report of what needs attention now and soon.
Can I inspect a used car myself without a mechanic?
You can catch most problems yourself with this checklist: body and rust, tires, fluids, electronics, a 20-minute test drive, and a VIN and title check. A mechanic’s lift inspection and scan still catch what you cannot see from the ground, so use both — your check first, then the professional one.
What should I check when buying a used car from a private seller?
The same checklist, plus extra paperwork care: verify the seller’s name is on the title, the VINs all match, there is no outstanding lien, and the sale is completed where the title can be transferred cleanly. Never pay in full before the signed title is in your hand.
How do I check a used car for flood or salvage history?
Lift the mats and check for dampness, mud, or a musty smell, look under the dashboard and seats for silt, and check the title status and history report for salvage, rebuilt, or flood branding. A strong air freshener or fresh undercoating can hide flood signs, so treat either as a reason to inspect harder.
Should I get an inspection if the dealer says the car is certified?
Yes. Certification programs vary, and a certified label is not a substitute for an independent inspection. A $100–$200 inspection on a certified car either confirms the certification or finds what it missed — both outcomes are worth the price.