
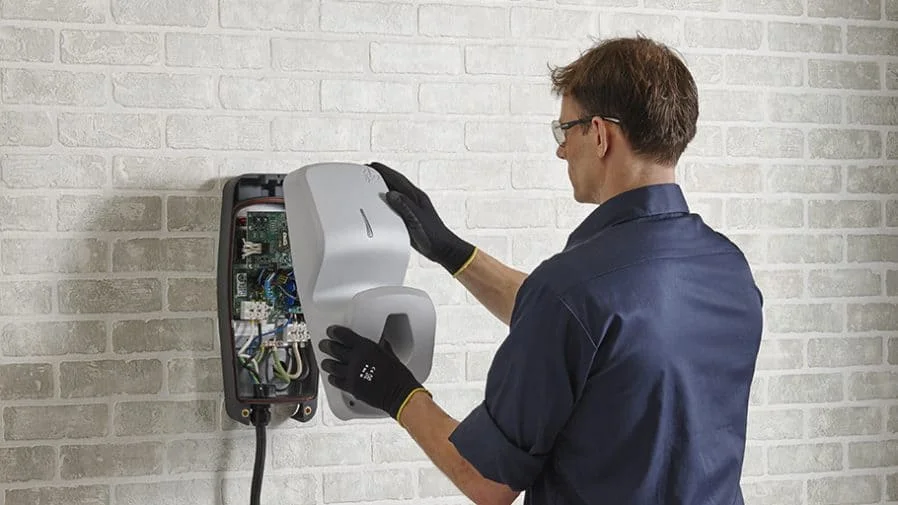

Short answer: Installing a home EV charging station follows six steps: have an electrician run a load calculation on your panel, pick a location within reach of your car’s charge port, choose a charger with the right amperage, get three quotes from licensed electricians, have them pull the permit and run a dedicated 240-volt circuit, then pass inspection and claim any utility rebates. A typical install takes two to four hours on the day, and one to three weeks end to end.
The critical part is the order. Check your panel before you buy a charger — doing it the other way round is the most expensive mistake in the whole process.
Installing a home charging station is the single biggest quality-of-life upgrade for a new EV owner. It’s also the step most people approach backwards — buying a charger first, then discovering their electrical panel can’t support it.
This guide walks through the process in the order it should actually happen, from checking your panel to the final inspection. It’s written for getting the job done properly, not for doing it yourself: running a new 240-volt circuit requires a licensed electrician and a permit in almost every US jurisdiction, and this is one of the genuinely dangerous DIY jobs.
Table of Contents
Before You Buy Anything: Check Your Panel
This is step one, and skipping it is the most expensive mistake in the whole process.
Go and look at your electrical panel. The main breaker at the top will be labelled with your service size — usually 100A, 150A or 200A. Note that number, and note whether there are free slots for a new double-pole breaker.
- 200-amp service with free slots — you’re probably fine
- 100-amp service — possible, but likely needs assessment or upgrade work
- No free breaker slots — you’ll need a sub-panel or a service upgrade
Free slots aren’t the whole picture, though. What matters is your total existing load: your HVAC, water heater, oven, dryer and everything else running at once. A licensed electrician performs a formal load calculation to determine whether adding a continuous 40 or 48-amp draw is safe.
Get that calculation done before you buy a charger. It costs little or nothing as part of a quote visit, and it determines everything that follows.
Step 2: Decide Where the Charger Goes
Walk the route from your panel to where you park, and measure it. Distance is the second biggest cost driver after panel capacity.
Things that matter:
- Distance from the panel. Under 20 feet is ideal. Cost climbs noticeably past 50 feet because thicker wire is needed.
- Which side of the car the port is on. Most charging cables are 18 to 25 feet. Mount the unit so the cable reaches comfortably without stretching across the vehicle.
- Indoor or outdoor. Outdoor installs need weatherproof enclosures and conduit, adding several hundred dollars.
- Detached garage. This usually means trenching and underground conduit, which is the single most expensive routing scenario.
- Future-proofing. If you might add a second EV, ask whether the circuit can be sized for that now. Doing it later means paying for the same labor twice.
Step 3: Choose the Charger
The important decisions here are less about brand than most buyers expect.
Amperage
Chargers are commonly available in 32A, 40A and 48A versions. Higher amperage charges faster but requires a heavier circuit and more capacity from your panel.
- 32A (7.7 kW) — roughly 25 miles of range per hour. Enough for most drivers.
- 40A (9.6 kW) — a middle ground.
- 48A (11.5 kW) — fastest common home rate, but needs a 60-amp circuit and enough panel headroom.
Bigger isn’t automatically better. If you drive 40 miles a day and park overnight for 10 hours, a 32A unit refills that several times over. Paying for 48A capability you never use — and possibly a panel upgrade to support it — is a common overspend.
Hardwired or plug-in
A plug-in charger connects to a NEMA 14-50 outlet, the same 240-volt outlet used for electric ranges. A hardwired unit is wired directly into the circuit.
Plug-in lets you swap or take the charger with you and works with portable units when travelling. Hardwired is required above 40A in many setups and is often preferred for permanent outdoor installation. Costs are broadly similar.
Connector type
Through most of 2026 the US market has been transitioning from CCS to NACS (the Tesla-style connector). Many new home chargers now ship with NACS or include an adapter. Check what your vehicle uses and whether the charger you’re considering matches, since this is still in flux.
Smart features
Wi-Fi connected chargers let you schedule charging for off-peak electricity rates, which can meaningfully cut running costs depending on your utility plan. Some utility rebate programs require a connected charger to qualify — worth checking before you buy.
Step 4: Find and Vet an Electrician
Not every electrician installs EV chargers regularly, and this job has specifics worth asking about.
What to check:
- Licensed and insured in your state
- Has done EV charger installations before — ask roughly how many
- Will pull the permit themselves as part of the job
- Provides an itemized written quote, not a single lump sum
Get three quotes. Pricing for identical work varies 40 to 60% within the same metro area, and three quotes reliably finds the honest middle.
Questions worth asking each one:
- What does the load calculation say about my panel?
- Is a panel upgrade genuinely required, or would a load management device work instead?
- Is the permit included in this price?
- What wire gauge and breaker size are you installing?
- How long will the job take, and is it one visit or two?
That load management question matters. These devices monitor your home’s draw and throttle the charger when other large appliances run, often avoiding a panel upgrade entirely. Not every electrician offers them unprompted.
Some charger manufacturers run certified installer networks, and your electric utility may also maintain a list of approved installers — sometimes required to qualify for their rebate.
Step 5: Permits and Approval
In most jurisdictions, any new dedicated 240-volt circuit requires an electrical permit and a final inspection.
Your electrician normally handles the application, but confirm it’s included in the quote rather than assuming. Permit fees typically run $50 to $800, averaging around $300, and vary widely by city and county.
Two other approvals worth checking before work starts:
- HOA or landlord approval, if applicable. Many states have “right to charge” laws limiting what an HOA can refuse, but the process still needs following.
- Utility notification. Some utilities want to know about a new large load, and some offer rebates that require pre-approval before installation begins.
Unpermitted electrical work is a genuine problem, not a technicality. It can void home insurance, fail a home inspection when you sell, and leave you without recourse if something goes wrong.
Step 6: Installation Day
A straightforward install takes two to four hours. Complex jobs involving trenching, long conduit runs or panel work can take six to ten, sometimes across two visits.
What typically happens:
- Power to the panel is shut off
- A new double-pole breaker is installed — 50A for a 40A charger, 60A for a 48A charger
- Wire is run from the panel to the charger location, through conduit where required
- The charger or NEMA 14-50 outlet is mounted and connected
- Power is restored and the installation is tested
- The electrician walks you through operation and any app setup
Mounting height is worth mentioning if nobody raises it: roughly 48 inches from the floor is standard, which keeps the cable off the ground and the unit easy to reach.
Step 7: Inspection and Rebates
An inspector visits after the work is complete to verify the installation meets code. Your electrician should coordinate this. Keep the signed-off permit — you may need it when selling the house.
Then claim what you’re owed:
- Utility rebates — often several hundred dollars, sometimes requiring proof of a connected charger or an approved installer
- State programs — vary widely; check your state’s official energy office
- Off-peak charging rates — many utilities offer a discounted EV rate that’s worth switching to
The federal Section 30C charger credit is no longer available; it required equipment placed in service before July 1, 2026. Keep receipts if your install predates that. For the wider picture on federal incentives, see our guide on whether the EV tax credit is still available.
Search the US Department of Energy’s incentive database for programs in your state, and check your own utility’s site directly — those rebates are often not listed anywhere else.
Common Mistakes to Avoid
- Buying the charger before the load calculation. The most common and most expensive error.
- Skipping the permit. Saves a few hundred dollars now, causes real problems later.
- Over-speccing the amperage. Paying for 48A plus a panel upgrade when 32A would have covered your driving.
- Getting only one quote. The spread between quotes for identical work is large.
- Mounting it in the wrong place. Measure your cable reach against where the car’s port actually sits.
- Ignoring utility rebates until after installation. Some require pre-approval and can’t be claimed retroactively.
Frequently Asked Questions
Can I install an EV charger myself?
Running a new 240-volt circuit requires a licensed electrician and an inspected permit in most jurisdictions. It’s high-current work where mistakes cause fires. Mounting a charger onto an existing, correctly-rated 240-volt outlet is a different matter and is generally fine for a competent DIYer.
How long does the whole process take?
The installation itself is two to four hours for a typical job. Allow one to three weeks end to end, accounting for quotes, permit processing and scheduling.
Do I need a 200-amp panel?
Not necessarily. A 100-amp panel can sometimes support a lower-amperage charger, particularly with a load management device. Only a load calculation gives you a real answer.
What if I rent or live in an apartment?
Several states have “right to charge” laws that limit a landlord’s or HOA’s ability to refuse a charger installation, though you typically bear the cost. Start by asking your landlord or building management, and check your state’s specific rules.
Should I get a 32A or 48A charger?
For most drivers, 32A is sufficient — it adds roughly 25 miles of range per hour, refilling a typical day’s driving several times over during an overnight charge. Choose 48A if you drive very high mileage, own a large-battery vehicle, or share one charger between two EVs, and only if your panel supports it without a costly upgrade.
Can I take the charger with me if I move?
A plug-in unit on a NEMA 14-50 outlet, yes — you unplug it and leave the outlet. A hardwired unit is generally considered a fixture and stays with the house.
Does installing a charger add value to my home?
It can, particularly as EV ownership grows, and a properly permitted installation is a genuine selling point. An unpermitted one is the opposite — it can complicate a sale.
Related Reading
- EV Charger Installation Cost: What to Expect in 2026 — full price breakdown by component.
- Is the EV Tax Credit Still Available in 2026? — what happened to federal EV incentives.
- Fuel Cost Calculator — compare your fuel spend against charging costs.
This guide is general information. Electrical requirements and permit rules vary by jurisdiction — always work with a licensed electrician who knows your local code. Last reviewed: September 2026.